|
VOCABULARY:
MATERIALS:
VIDEOS
Why are all sands the same
https://www.youtube.com/watch?v=pxmHHoTPSKI
The amazing life of sand https://www.youtube.com/watch?v>
BACKGROUND:
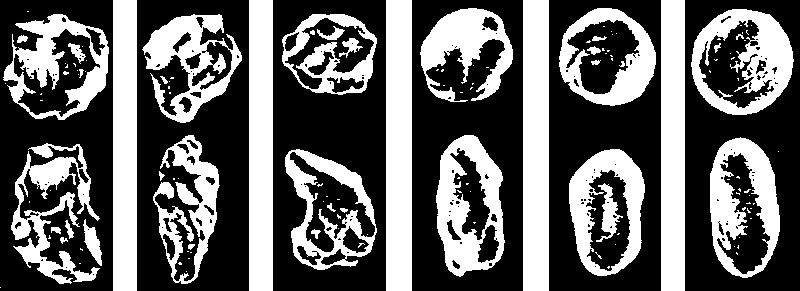
Sedimentologists (geologists that work with sedimentary rocks), understand the significance of sand grains in rocks. The size, shape, and roundness help to explain the sandstone’s "life history." Eventually sand will break into very small pieces and when mixed with organic matter produces soil. Erosion is the removal of weathered material on the earth’s surface by to the action of wind, ice, heat, water, and humans. The agents of weathering break apart parent rocks into smaller fragments. These fragments may become sand if sufficiently broken down. Small rock pieces become smaller through movement, as they hit other rocks and chip away. Since sand comes from a "Mother" or source rock, it is possible to determine what type of rock produced the "baby rocks." The composition and general color of both the "baby" and "mother" rock are often very similar. This lab emphasizes two points. First, sand composition reflects the sand’s source. Second, the roundness of individual sand particles reflects how far the sand traveled and for how long. Sand is usually created when water and/or wind break off small pieces of pre-existing rock. If the particle is "newly" broken off, it tends to have an angular look, but if the particle has traveled by water or wind for a long time it becomes rounded. The river's water carries the rocks along the bottom of the river bed. The pebbles are eroded by abrasion. The longer a pebble stays in the river bed, the more rounded it will become. The more angular a pebble the shorter the period of time it has been moving. Since sand comes from a "Mother" or source rock, it is possible to determine what type of rock produced the "baby rocks." The composition and general color of both the "baby" and "mother" rock are often very similar. There are five possible source materials for the sand in this lab. Granite is a plutonic igneous rock. It occurs in varying shades of light and dark colors depending on the specimen’s mineral composition. Serpentinite is a metamorphic rock that is smooth, green, and scaly. It is the state rock of California. Chert is a sedimentary rock that forms from the shells of microscopic marine life in deep ocean environments. It is very hard, and comes in many colors. Quartz is found in many rocks including granite and chert, and is the main constituent of most sand. Most quartz crystals are clear or white in color. Basalt is a dark, fine -grained igneous rock. PROCEDURE:
Up until this lab we have been studying the organic components of soil.
Today we look at the minerals in soil—the non-living parts.
1. Powerpoint slide. Look at the second slide from the powerpoint “soil
formation” that presents the components of soil (the rest of this
powerpoint will be used in the next lab).
Note that on average the mineral parts are 45% and the organic
parts are much lower—only 5%!
So to understand soil, we need to understand the mineral parts.
The mineral bits of soil are made up of various sizes of broken down
parent rock. We are going to
look at how rock can become mineral particles by studying sand.
2.Show videos. Tell students that they will get to understand a sand’s
“life history” of erosion from the parent rock.
·
First Video: “ The amazing life of
sand” talks about what sand is, where it comes from and why it varies.
The second .
·
Second Video: “Why are all
sands the same” talks about the similarity of most sands due to the
presence of quartz and how they come to be at the beach.
3.Prepare sand cards. Tell students they will get to look at 6 sands and
try to figure out the parent rock for each and the life history for each.
Each
students will prepare a Sand Card with examples of sand from 6 different
beaches (5 from California,1 from New York) that have variable parent
rocks and erosion histories.
To make the sand card, set out the 6 types of sand in small trays with
labels. Students will take
sticky dots and place a sticky dot, sticky side down in one of the sand
samples. Then use the glue
stick to glue the dot with the sand side up onto the card.
They should write the name of the beach next to the dot.
Repeat for the other samples (see photo below).
ANALYSIS OF SAND HISTORY.
For the analysis they should work in teams of two or three.
They can use microscopes and hand
lens to help them see the grains more easily.
4. Hand out the Sand Chart.
You will need to go over how the Sand Chart works for them.
Instruct the students to use the
size component of the Sand
Chart to determine the size of the sand particles and write it down on
their worksheet. a.
SIZE: You
have two circles with dots that are the size that is written along the
outside of the circle. There is a dark circle and a light one...only
because light sands are seen lighter backgrounds. Have them sprinkle a
little on the paper and find the size that the particles fit into. In most
cases their will be a range of sizes. Size just tells you how long a
particle has been eroding...the longer it has been moving around the
smaller it will be in general.
Tell the students to try and identify the source rock for each sand sample. Emphasize that rocks contain many clues about their origins. Tell the students that they can interpret the history of rocks, using their powers of observation. Show examples of "mother" or source rocks to the students. Describe the origin of each source material to the students. Be sure to point out that quartz is a mineral and not a rock. Each sand sample will resemble the mother rock because the sand has the same mineral composition. Have samples of granite, chert, serpentinite, and basalt on display to aid the students in their description of the sand samples.
|


 CLEONE,
Mendocino County, California -.25-0.5mm;
well sorted; subangular - subrounded. Contains quartz, feldspar, and
dark lithic fragments. The dark color is due to about 20% of lithic
fragments. Also may contain pieces of shell material. Type of rock
from drainage area is greywacke.
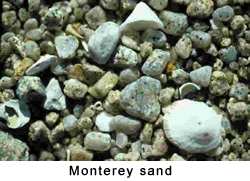
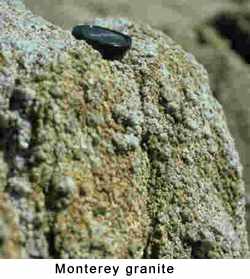
 Beach sand, Monterey has not been chemically weathered. Abrasion of
large boulders of granite along the coast have mechanically broken
this sand.